Sunday 29 March 2015

Ginger Mango Lemonade


Living in Nigeria, we are exposed to extreme weather conditions. Blazing heat. Tropical thunder storms. Its been blazing hot for the past few months and keeping hydrating is imperative to avoid sunstroke and general unpleasantness. Water is of course the best way to keep hydrated - the colder the better for me. However, we all need a break from water and crave something sweet to quench our thirst. Ice creams or fizzy sodas are not a regular part of my diet and I do not find them refreshing. Instead I find myself drinking water to cleanse my palate after I treat myself to any of them.
The only exception to my rule is lemonade. I love the freshness that comes from tangy lemons and by making my own versions at home, I get to control the level of sweetness. The flavor combinations are endless and if you are feeling naughty, you can 'harden' the lemonade by adding vodka to it. This version is a great way to use mangoes which are in season and by making a simple syrup and adding ginger to it, gives enough of a kick to cut down the sweetness from the sugar and the mangoes. Make a pitcher or 3 and keep refrigerated because you will not be able to get enough.
To make a pitcher of lemonade, you will need:
  • 2 ripe mangoes - peeled and flesh cut away from the stone and diced into small pieces
  • 1/4 inch of ginger - washed and cut into 2
  • 1 cup sugar
  • 6 cups of water
  • 2 cups lemon juice
Directions:
  • In a large sauce pan, combine the mangoes, ginger, sugar and water and simmer for about 10 minutes stirring constantly.
  • Remove from the heat and let cool
  • Strain mixture into a pitcher or jug and add the lemon juice
  • Stir and taste. Add more water if mixture is too sweet or add a dash of vodka if its an adults only drink
  • Refrigerate for at least an hour before serving
The variations are endless - add fruits of your choice and even herbs like mint or African basil (our local 'scent' leaf) for unexpected flavor profiles.
Enjoy!!!

Saturday 28 March 2015

Coming Soon.......

Combining my 3 loves: Food, Brain Power & Mother Africa and working with the amazing Mayowa Fabode.

Are you ready?

Friday 27 March 2015

Thai Style Coconut Lemon Grass Chicken


Sooooo....

It is no secret that I love Thai food. I haven't been to Thailand before and while it is on the list of places to visit, I have had many a meal at Thai restaurants in a few countries and I have sampled a lot of the staples. Thai food has that delicate balance of sweet, sour and spicy elements that when combined in the right ratios is food nirvana. While I might not be an expert in this cuisine, there are a few staples in Thai cuisine that are pretty common in these parts and can be used with everyday ingredients to evoke tastes of street food in Bangkok. These include: lemon grass, fish sauce and coconut milk.

Which brings me to this baked chicken dish. The beauty of this dish is its almost a hands off dish. The chicken sits in the marinade overnight and is baked till done. This means you can spend your time making a side to go with it: rice, couscous, acha, salad, stir fry ---- whatever rocks your world.

To make 8 pieces of chicken, you will need:
  • 8 pieces of chicken - I prefer bone in pieces like the thighs and drumsticks
  • 1 can coconut milk
  • 1 medium red onion - rough chopped
  • 1 small piece of ginger. Peeled and chopped into little pieces
  • 2 lemon grass stalks- rough chopped
  • 3 green chilies - rough chopped (use as many or as few as you prefer) 
  • 1/2 teaspoon fish sauce
  • Salt to taste
Directions:
  • Combine all the ingredients except the chicken and salt in a bowl with a secure lid
  • Stir to combine and taste. Season with salt to taste. Fish sauce is salty so you need to add salt last to be sure you do not over season
  • Add the chicken and ensure all pieces are covered with the marinade. Use a skewer to poke holes in the chicken to ensure even marinade.
  • Cover and marinade in the fridge over night
  • Preheat oven to 350F and line an oven proof dish with foil (this makes clean up a breeze)
  • Arrange chicken in a single layer and spoon some of the marinade over the chicken and bake till done - 25-30 minutes
  • Baste the chicken with the remaining marinade at least once during the cooking process
  • Serve with a side of your choice
There will be some marinade left in the baking pan after the chicken is ready. That is a simple pan sauce that you can reduce in a sauce pan and serve by the side of your meal to be used over the side you serve this chicken with.

Enjoy!!!


Saturday 21 March 2015

I say Potato, You say Petatoes, We say Poraros – Sweet Potato Muffins


With all the advances in technology today, I still cannot believe it is impossible to clone humans safely. This is a roundabout way of saying that life has been so incredibly busy that getting posts done for BN Cuisine has been next to impossible. However, I have come up with a few tricks that make juggling a little easier. If I can only stick to the plan…..

On to the potatoes…

Sweet potatoes are a favorite in many households (and kids absolutely love them) – usually served fried in Nigeria and available in different variants. The locally grown sweet potatoes look like cocoyams with tan or dark brown skin and usually have white flesh when peeled. Sweet potatoes from Benin Republic are very common here in Nigeria as well with darker peel than the local variety. These varieties of potatoes can range in taste from bland to mildly sweet. Some supermarkets sell imported sweet potatoes (usually from Europe) with darker red / orange skin that have orange flesh when peeled and can be saccharine sweet. The North Americans call them yams (insert side eye here) and are a staple at many a Thanksgiving dinner table with brown sugar and butter added and topped with marshmallows – bordering on dessert in my opinion. The local variety has the same texture as floury potatoes when mashed unlike the imported kind that tend to be moister.

We tend to get stuck in a rut with foods on heavy rotation in our lives and sometimes in the case of the sweet potato, it is just easier to fry them and move on. This humble root vegetable can be used in so many different ways – try boiling and mashing the potatoes and adding a little butter, salt and cream and serving with steak or grilled chicken with some veggies on the side, or bake with fresh herbs like thyme and rosemary for a fragrant healthier option, You can also make a traditional pottage (porridge) using yams and some sweet potatoes as well as add chunks of sweet potatoes into spicy pepper soup instead of yams.

So many options but how about making some muffins with them? Makes sense in my world for the following reasons: honey muffins, waffles and cornbread are common side dishes served with savory meals in certain parts of the world, sweet crepes can be stuffed with savory fillings – why can’t I make muffins using sweet potatoes that will be a little dense and not overly sweet – which will make them perfect for mopping up sauces? A crunchy topping gives textural balance to these little guys. I also committed to serving corn bread at a Southern themed brunch event and went into the pantry and discovered that packets of cornmeal had developed legs (or I used them all and forgot to restock) and needed an alternative fast and I had quite a few sweet potatoes staring at me. After 3 tries, I was happy with the results and got rave reviews. Seeing as I hate going anywhere empty handed, these also made a pretty gift in a box after the event.

To make 18 muffins, you will needs:

  • 3 large sweet potatoes (weigh them to get 450g of potatoes)
  • 280g all purpose flour
  • ½ teaspoon ground cinnamon
  • ½ teaspoon ground nutmeg
  • 2 teaspoons baking powder
  • ½ teaspoon salt
  • 2 eggs
  • 125g sugar
  • ½ cup vegetable oil
  • ½ cup liquid full cream milk
  • 1 teaspoon grated lemon zest
  • 1 cup mixed nuts

For topping:

  • 2 tablespoons sugar
  • 1 teaspoon cinnamon

Directions:

  • Peel sweet potatoes and cut into chunks. Add to a pot of water and cook till soft. Drain and mash using a food processor or a mini pestle and let cool
  • Line muffin tins with paper cups and pre heat oven to 200C or gas mark 3
  • In a bowl, stir together flour, cinnamon, nutmeg, baking powder and salt
  • In another bowl, stir sugar and cinnamon for topping
  • In another bowl, whisk eggs, sugar, oil, milk and orange zest till smooth. Add the mashed sweet potatoes and stir until well blended. Add the flour mixture until just combined. Do not over mix
  • Add the nuts and stir to combine. Spoon batter into muffin cups and sprinkle each muffin with some topping mix
  • Bake muffins until a toothpick inserted comes out clean – 20 -25 minutes
  • Serve with butter and your favorite baked or fried protein.

Enjoy!!!


Friday 20 March 2015

Green Egg Scramble


Eggs. Simple enough to make one might think but it is for that exact reason that eggs can be boring. Like a lot of foods that we eat regularly, we tend to go into default mode with eggs – boil or fry. Make an omelet with onions and tomatoes and some chilies if you like some heat.
I love to use eggs as a carrier for vegetables. It is a lot easier to feed my family insane amounts of vegetables if I include them in eggs. This green egg scramble concept is also a very delicious way to deal with egg white only omelets if you are on a diet. By loading the eggs up with all these fiber and nutrients, a small bowl is quite filling which means – no need to have carbs on the side to fill you up. You can also make a few eggs go a long way as well.
To make a 4 egg scramble, you will need:
  • 4 eggs
  • A small bunch of greens – spinach, kale, ugwu (fluted pumpkin leaves) or lettuce will work. Use one type or a combination
  • 1 green bell pepper – deseeded and finely chopped
  • 1 carrot – grated
  • 2 spring onions – finely chopped (white and green parts)
  • Cheese – grated cheddar,mozarella, smoked gouda – any kind of cheese you prefer or a combination. I usually use a smoked cheese because of the delicious flavor it adds to the omelet
  • Salt and white pepper
  • Oil: Olive, vegetable, canola oil can be used. Unsalted butter can be used as well
Directions:
  • Prepare all the vegetables and set aside
  • Crack eggs in a bowl and season with salt and pepper. Whisk till well combined
  • In a large skillet or frying pan, add just enough oil to coat the bottom of the pan
  • Add the vegetables and cook for 5 minutes stirring constantly
  • Add the eggs and using a wooden spoon or spatula stir the eggs constantly on low heat. Low and slow is the secret to moist eggs
  • Add the grated cheese and stir mixture until the cheese has melted
  • Serve hot
Enjoy!!!

Wednesday 18 March 2015

Making Dodo (Fried Plantain) a little sexier......


With the addition of just 2 ingredients, fried plantain gets a whole different flavor profile.

Enjoy!!!

Saturday 14 March 2015

Garden Update - March 2015. Disaster + Progress

I cannot believe it has been 3 months since I started this wonderful journey. This month I suffered my first epic fail with my sweetcorn plants. However, every fail is a learning point.....
 
On to the updates:
 
Green zucchini plants: a rash of male flowers open and fall off. Apparently that is normal. Until the female flowers show up and get pollinated and bear fruit, the plant just keeps growing taller

This mystery plant is no longer a mystery. It is a sugar baby watermelon plant. I guess the wind must have blown a seed into this pot. It is thriving and has even started producing male and female flowers

Cilantro sprouts. These germinated very fast. Watching them keenly

These have such an amazing smell and I really cannot wait till they are ready for harvest to be added to sauces and other dishes

A new kid on the block. These are supposed to bear fruits that are not as large as what we are used to but with very sweet fruit

Golden jubilee tomato plant. This has begun producing yellow flowers which means fruits are not far behind

Hibiscus blooms

Rose blooms. These have such a heady scent especially in the evenings

The fail. The sweetcorn plants had ears of corn and sporadic kernels. This happens when there s incomplete pollination. Lesson learned: Plants should have very little space between them. I have replanted and I am keeping my fingers crossed for better luck next time.

Butter crunch lettuce - which I have started enjoying in salads

Cabbage plant. Still waiting for the head of cabbage to develop. Apparently the leaves can be used to make things like cabbage rolls

 
Trying my luck with cucumbers. They will need support as they develop vines that can be difficult to control

Thyme and garlic chives

The sugar baby watermelon flowers. The one with the swelling is a female flower that is only open one day in the season. I used a paintbrush to brush pollen from the male flower onto the female flower. Just in case

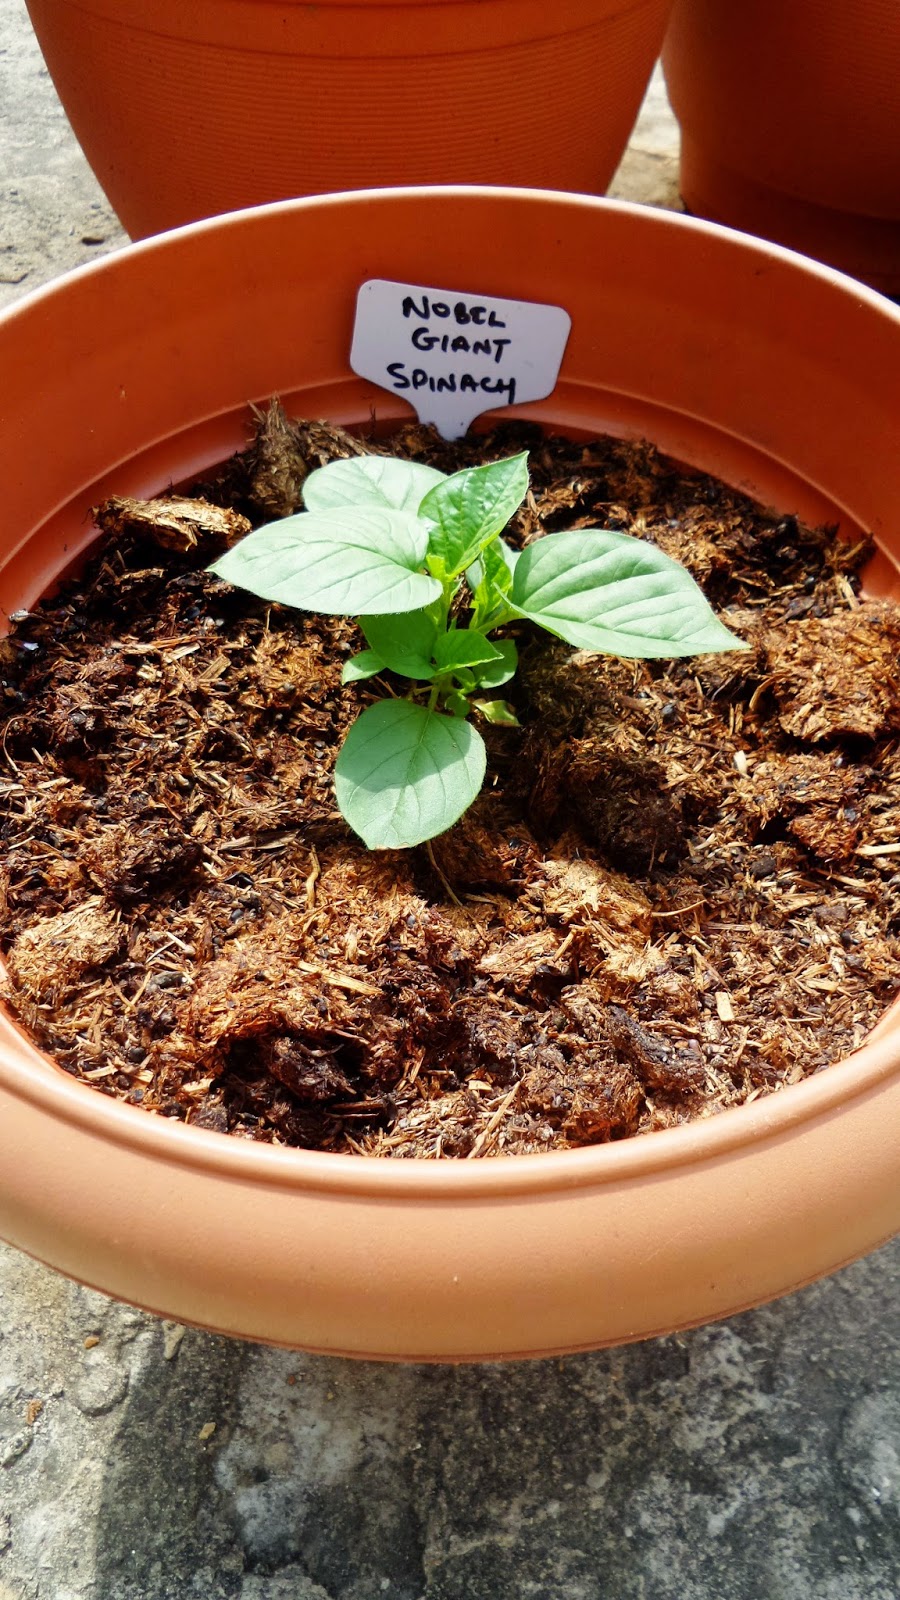
This variety of spinach is supposed to get really really big

I have never had kohlrabi before and I am looking forward to harvest

Jalapeno pepper plants flowering. Fruits should be close..

Chinese cabbage - Pak Choi

I love lettuce so it makes sense to have different kinds growing at the same time

White ribbed swiss chard

Snowball cauliflower
I bet there will be tons of updates next month. Happy planting!!!!

Friday 13 March 2015

Mango & Coconut Cupcakes with Lime Whipped Cream Topping


I am dreaming of a holiday. Not just any old holiday. I am dreaming of white sandy beaches, clear blue skies, bathing suits and sarongs, ridiculously colored drinks with umbrellas – on a Caribbean island far, far away.

Since I will not be taking a holiday anytime soon (with the number of hats I wear, I can only pray for a break at some point), I figured I could bring a taste of the Caribbean close to home and satisfy my sweet cravings at the same time. There is no flavor more synonymous with the Caribbean than coconut. Papayas and mangos tie for second place in my opinion so I went into mad scientist mode and decided to play around with these flavors in cake. The papaya (pawpaw) experiment was a hot mess. Mushy and nasty. I shudder just thinking about it. Using mangos however, success. The result of this experiment are cupcakes that are not too sweet, full of tropical flavor and topped with light as air whipped cream with bursts of citrus flavor from grated lime zest – the Caribbean in your mouth.

To make 18 cupcakes, you will need:
  • 1 1/2 cups all purpose flour
  • 1/2 cup sweetened flaked coconut
  • 1 1/2 teaspoons baking powder
  • 1/4 teaspoon salt
  • 1 cup granulated sugar
  • 1/2 cup melted and cooled unsalted butter
  • 2 eggs
  • 1/3 cup liquid full cream milk
  • 1 cup peeled, chopped ripe mango
Frosting:
  • I cup whipping cream
  • 1/2 cup icing sugar
  • 1 teaspoon lime zest
Directions:
  • Pre heat oven to gas mark 3
  • Line muffin tin with muffin liners and set aside
  • In a bowl, mix flour, coconut, baking powder and salt
  • In another bowl, whisk sugar, butter and eggs until smooth. Add flour and milk and beat until smooth. Add mango and stir to combine. Do not over mix
  • Scoop batter into muffin liners – fill liners about 3/4 to the top.
  • Bake for 20 – 25 minutes or until golden brown and tops of cupcakes spring back when lightly touched.
  • Let cool completely and make frosting
  • Add whipping cream, icing sugar and lime zest into a mixing bowl and whip till stiff. An electric hand mixer or stand mixer will make this frosting in a short period of time
  • Top cooled cupcakes with whipped cream frosting and serve.
Enjoy!!!

Monday 9 March 2015

Prawn Stir Fry - A handful of ingredients make a sexy Sunday lunch


I had the most intense week - Shoots, writing deadlines, recipe testing, the bakery, meetings, school run etc.

By the time the weekend came round, all I wanted to do was sleep, sleep and sleep.

Sunday came and I was still exhausted. I could have gotten away with take out. The mister wouldn't have minded. However, me being me (don't you see the super woman cape behind me), I decided I would rustle something up. The goal was to make some thing yummy that would not take any time but allow me to use up some of the vegetables I had in the fridge that I planned to do different things with but couldn't find the time to do.

I took inventory and I had: tiger prawns, yellow, red and green bell peppers, tomatoes, red and white onions and tomatoes.

First step - get the rice going. I emptied a 400ml can of coconut milk and half a sachet of coconut milk powder into a pot with some salt and brought to a boil. I added the washed rice and set on low heat to cook gently and absorb all the coconutty goodness.

A good way  to stretch expensive tiger prawns is to cut each prawn into about 3 pieces. That way, each person can get 6  or more pieces of prawns rather than a single one which might look and feel stingy on the plate. Psychological but it really works.  I chopped the prawns into pieces and rinsed thoroughly and placed in a bowl. A dash of seafood spice and a good rub was all the prawns needed.

I sliced 1 red onion, julienned the peppers and set aside. As I was working I remembered my spiralizer that I got last year that hasn't really done enough work. I decided to make a simple salad using this cool gadget. I made cucumber strands (you can just chop the cucumber into bite sized pieces if you don't have a spiralizer), finely sliced a white onion and chopped up 2 tomatoes. I placed the cucumber, onions and tomatoes in a bowl and set aside. A quick dressing for the salad - extra virgin olive oil, salt, black pepper and a little pure natural honey for a hint of sweetness. Whisk and add to the salad. Toss and keep in the fridge till ready to serve.

On to the prawns. A wok. A dash of olive oil. Add the onions and peppers and sauté for about 3 minutes. Add some light soy sauce, a few drops of sesame oil and some pepper if you like - I used a pinch of dried yellow pepper. Add the prawns and stir till the prawns are cooked through.

Serve stir fry with the coconut rice and salad.

Simple, delicious, colorful and an all round crowd pleaser. I had some sauce left over and no prawns - I added some leftover baked chicken pieces to the sauce - voila - lunch for the little man for school.

Tuesday 3 March 2015

Behind the scenes....


I just finished shooting a few episodes of a cooking show that will air on EbonyLife TV from May 2015. I will share more details and a few more pictures soon.

What am I looking at? A camera installed above the hub...LOL.

Enjoy!!!

Monday 2 March 2015

From Garden To Table - Cucumber, Onion & Radish Pickles


After harvesting the last of the cherry belle radishes in the pot, I knew having them in a salad again would not go down well with the mister. I had a basic pickle recipe saved up using radishes but I only had 6 cherry belles left - they aren't called cherry belles for nothing. They are cute but really tiny. So clearly, I would need literally baskets of radishes to have enough for a decent sized jar.

Solution: a mixed pickle jar. This is a quick pickle recipe which means the pickles will be ready to eat in as little as 3 hours. I am keeping the jar in the fridge overnight and will use on sandwiches tomorrow.

To make a jar of these mixed pickles, you will need:
  • 1 large cucumber
  • 1 medium white onions
  • 6 radishes
  • 1 cup apple cider vinegar
  • 1 cup water
  • 9 table spoons sugar
  • 1 1/2 teaspoons salt
  • 2 cloves peeled garlic
  • 1 dry bay leaf
  • 6 whole black peppercorns
Directions:
  • Using a mandolin slicer or a very sharp knife, thinly slice the cucumbers, onions and radishes and place in a jar with a lid that secures firmly. Add the garlic cloves, bay leaf and peppercorns and set aside.
  • In a saucepan, pour the vinegar, water, sugar and salt and warm through until sugar dissolves
  • Pour mixture over vegetables and aromatics in jar and close
  • Refrigerate for at least 3 hours.
These pickles will be excellent in sandwiches and burgers, over grilled steak or as a crunchy, tangy elements in a salad and should keep in the fridge for up to 3 weeks.

Enjoy!!!

Noodles My Way


Say no to bland boring noodles.....

Enjoy!!!

Sunday 1 March 2015

Garden Update: Harvest.....


Look at these little beauties. My first harvest - well 2nd but all radishes. I pulled 4 radishes out of the pot yesterday and had them in a little salad. Peppery and crunchy - they added a bite to the salad that I love. These 3 I got out today and there are only 6 left in the pot. The feeling I have  - excitement, happiness and fulfillment. I shall try my hand at quick pickles with these 3 tomorrow and I shall post results - success or fail.

I have planted another type of radish - white icicle radishes and since I have never tried them before, I am keen to see if the flavor is the same as these cherry belle ones.

From Garden To Table - simply amazing.

Enjoy!!!